|
VIP’s November 2013 E-mail Newsletter
Website: http://vip.vast.org President: Timothy Couillard
| What is PhysTEC and a TIR? |
The U.S. faces a critical shortage of qualified physics and physical science teachers. Two-thirds of new physics teachers lack a physics degree, and over 90% of middle school physical science students are taught by teachers without a physical science major or certification. In order to address the crisis in physics and physical science education, the American Physical Society (APS) and the American Association of Physics Teachers (AAPT) lead the PhysTEC project, with support from the American Institute of Physics (AIP). The mission of PhysTEC is to improve and promote the education of future physics teachers. Specifically, the project aims to - Demonstrate successful models for increasing the number of highly qualified teacher of physics prepared at colleges and universities
- Spread best-practice ideas throughout the physics teacher preparation community
- Transform physics departments to engage in preparing physics teachers
One way PhysTEC tries to fulfill its mission is it sponsors a Teacher in Residence (TIR) at PhysTEC sites all over the country. The two PhysTEC sites in Virginia are located at James Madison University (JMU) and Virginia Tech (VT). Some of the responsibilities of a TIR are:
- Recruit future teachers. No one knows the rewards and challenges of teaching better than a TIR. TIRs can recognize potential future teachers and hit them with an enthusiastic and knowledgeable sales pitch.
- Supervise field experiences and mentor student teachers. Far too often, future teachers get their pedagogy training and advising from faculty with little or outdated K-12 teaching experience, and no involvement in the local school system.
- Teach methods and content courses. Who better than a TIR to teach future teachers? Teaching enables the TIR to get to know the students, and vice versa.
- Redesign existing courses and help design new ones. TIRs first-hand knowledge of the classroom and of inquiry-based teaching has proven invaluable in course development at several institutions.
- Develop and teach professional development courses and workshops. TIRs can help university physics departments reach out to teachers in local districts through professional development opportunities.
- Build bridges with local schools. TIRs come in with connections to local school districts, and you can use them to increase your department’s connections
If you are interested in learning more about the PhysTEC sites at JMU and VT and hearing from their current TIRs then come to our session at this year’s VAST PDI! Reproduced with permission from PhysTEC. (http://www.phystec.org/)
I grew up in Syracuse, New York, but found my way to North Carolina after being recruited to run cross-country and track at the University of North Carolina at Charlotte (UNCC). In 2001 I graduated with a B.A. in Physics and state licensure to teach high school physics. Since graduating from UNCC I have taught at a variety of schools (rural, inner city, independent, single gender, and religious) as well as a variety of subjects (11th/12th grade Honors/Regular Physics, IB Physics, AP B Physics, Principals of Technology, 9th grade Honors/Regular Physics, Introduction to Engineering, and Physical Science).
When I first started teaching I was a very traditional teacher. I relied heavily on lectures and notes to help my students learn. I presented complex and abstract concepts before laying a concrete foundation. I became frustrated with my students’ inability to understand and apply the ideas we talked about in class, and ultimately decided that I needed to change my approach to teaching. This is when I discovered the Modeling Method of teaching physics and started becoming the teacher I am today.
I have taken three 3-week long Modeling workshops as well as earned my M.Ed. from Walden University. These educational experiences have allowed me to transition my classroom from being teacher-centered to student-centered. I have replaced lectures and notes with student-led presentations, class discussions, and Socratic dialogue. I am rarely in the front of the classroom telling students what to do. Instead I have become a guide for my students.
When I saw great results in my classroom using Modeling, I decided to make this pedagogy available to others. Initially, a colleague and I offered half-day Modeling workshops at annual science teacher meetings. Then in 2008, after proposals and meetings, we instructed a successful three-week summer Modeling course through my alma mater, UNCC.
One year later I moved to Virginia with my wife. In 2010 I began working with the Virginia Instructors of Physics to organize four one-day Modeling workshops over the next two years. In 2012 I co-wrote a grant that funded professional development for almost 100 science teachers at the 2013 Content Teaching Academy at James Madison University (JMU), which resulted me being awarded the 2012 Physics Teacher of the Year Award by the Virginia Association of Science Teachers.
When I learned about the Physics Teacher in Residence (TIR) position at JMU, I was immediately interested. Improving physics education has gradually become more than just my side project, but a true aspiration that was often postponed in order to fulfill my obligations in the classroom. The TIR position is the perfect place for me to focus on this work full-time. I plan to use my experiences over the past 12 years of teaching high school physics to help JMU develop their physics education program, mentor future STEM educators, and support physics teachers in Virginia.
When I tell people that I am a physics teacher, they almost always share one of three memories with me. Either they loved physics because their teacher made it so interesting, they never understood physics because their teacher was so hard, or they happily managed to avoid physics because it sounded too difficult. What that says to me is that physics teachers have a powerful influence on their students. As humans, we are innately curious and observant—we are born scientists. Because physics describes and explains the most basic workings of the universe, it is inherently interesting for most students. Learning physics is hard work, but it is also fun! When we physics teachers welcome our students, believe that they can succeed, and give them the tools to do so, we greatly increase the likelihood that they will be among those that loved physics.
I have been fortunate to have spent the last 28 years teaching physics and other things. This year I am taking a leave of absence from the high school classroom to serve as Virginia Tech’s teacher in residence.
Surprisingly, I never planned on becoming a high school teacher. I earned a BS in Geophysics from Virginia Tech in 1984 and, unsure what to do next, decided to try teaching. It ended up being a great decision! I spent my first 16 years at Radford High School. Because it is a small school (450-600 students) I was the lone physics teacher and always taught 3-4 preps including Earth Science, Physics, General Mathematics, and Consumer Math. For the last 12 years I have taught at Salem High School (1200 students). When I started, there were only three physics classes. Because there are now 7 classes including IB Physics, we have two physics teachers. Having a colleague to collaborate with in the same building is wonderful! After 28 years, I still love working with students to help them think like physicists. I love when my students tell me that they thought about physics while driving or that they explained the physics of some phenomenon to their family at the dinner! I know that my physics students will see the world differently at the end of the year than they did at the beginning. A day in the life of a physics teacher is never boring—unless it is a workday and there are no students!
While at Radford, I received two grants—one in which my physics students designed and constructed stream monitoring equipment in collaboration with biology students, and another in which my earth science students collaborated with geometry students to conduct star parties for the community. I have also been a teacher trainer for Texas Instruments, led science summer camps for middle school students, been part of the Nanobiogeochemistry project at Virginia Tech, been appointed as an IB examiner, and mentored many student teachers. I am very excited to be a part of PhysTEC this year and to be able to spread the joy of physics teaching on an even larger scale. For more information on Virginia Tech’s PhysTEC program, talk to me at VAST’s or email me at mnorris@vt.edu.
| A Better Way to Teach Newton’s Second Law |
Below is a twist on the modified Atwood’s machine lab traditionally used to teach Newton’s Second Law. Unlike the traditional way of doing the lab, sleds that have noticeable friction force acting on them are used. This makes students to deal with friction as they would in real life when trying to determine the relationship between the net force acting on an object and the object’s acceleration. Below are the directions for how to construct the sleds needed to do the experiment, sample student data/results, and an explanation of the physics involved. Construction Directions 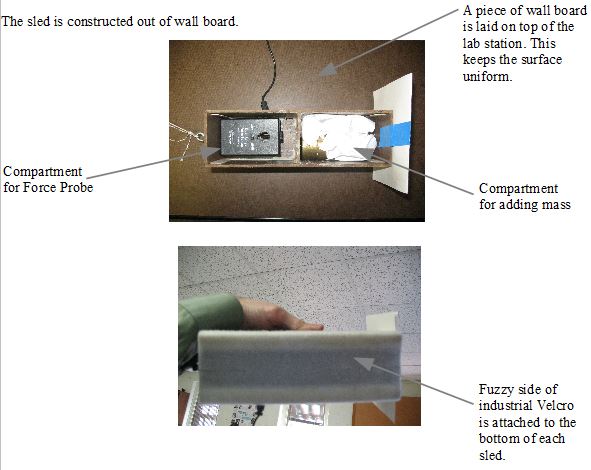
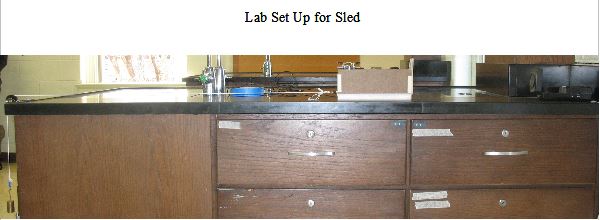
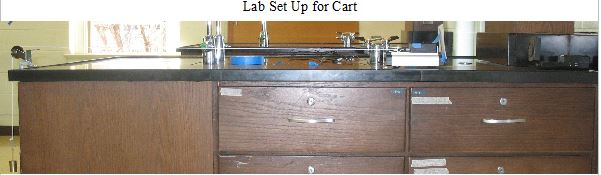
Lab Set Up
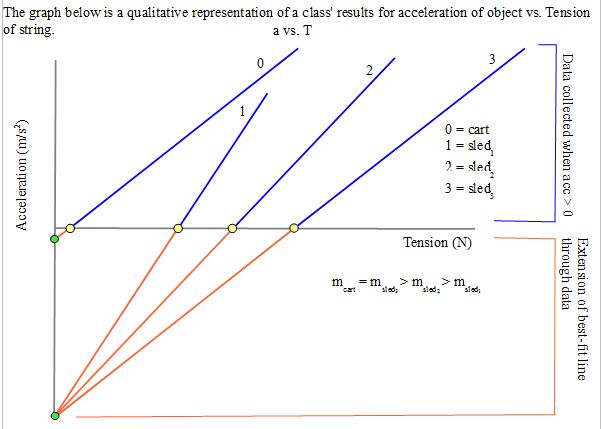
A cart is used to emphasize:
- That the slope of the a vs. T and a vs. Fnet graphs are the inverse of the mass of the object. The cart has the same mass as one of the sleds.
- The x-intercept of the a vs. T graph is equal to the amount of friction acting on the object. The cart will have a significantly smaller x-intercept than the sleds.
- Highlight that the y-intercepts on the a vs. T graphs for the sleds are roughy the same.
- The a vs. Fnet graphs for the cart and sled of equal mass will be almost identical. This can be used to emphasize that if the same Fnet is applied to objects of equal mass they will have the same acceleration.
Student Data 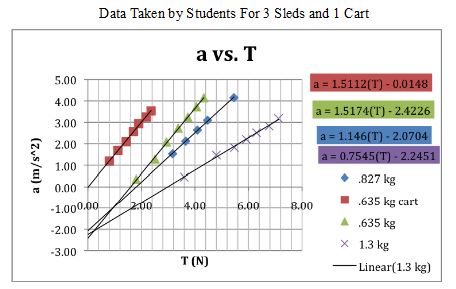
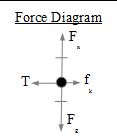
Explanation of Lab Results Note: Remember that data was only collected when the object was in motion. This is done so the frictional force acting on the object is constant throughout the experiment. So the force diagram for the object will be:
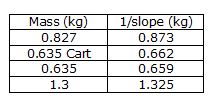
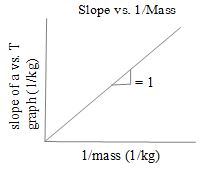
Meaning of Slope - As the mass of the object increases the slope of a vs. T graph decreases, indicating an inverse relationship between the slope of the graph and the mass of the object.
- This inverse relationship can be tested by graphing slope vs. mass.

- If the slope vs. mass graph is linearized then you will get a direct proportion with a slope of 1 and no units. (Experimentally the slope usually is about .95) This will confirm that the slope of the acceleration vs. tension graph is the inverse of the objects mass.
Meaning of x-intercept - The x-intercept occurs when the acceleration of the object is 0 m/s2. Since the acceleration of the cart is 0 m/s2, the net force acting on the cart must also be 0 N. Therefore the force diagram for the object will be:
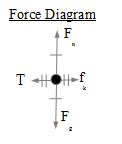
- From the above force diagram it can be seen that the tension of the string is equal to the kinetic friction acting on the object. So the x-intercept represents the amount of kinetic friction acting on the object. From our acceleration vs. tension graph we can determine that fksled3 > fksled2 > fksled1 > fkcart.
Creating an Acceleration vs. Net Force Graph - From the force diagram we can see that the net force (Fnet) acting on the object is simply:
Fnet = T - fk - Since fk (x-intercept of a vs. T graph) has already been determined, the Fnet can be calculated by subtracting fk from the tension in each trial. A graph then can be made of a vs. Fnet. This will result in the graph shown below.
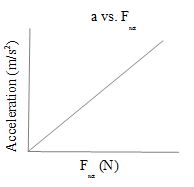
- From the above graph it can be seen that the acceleration of the object is directly proportional to the net force acting on the object.
- Also, the slope of the a vs. Fnet graph will be identical to the slope of the a vs. T graph. (Because the line of the a vs.Fnet graph is a parallel shift of the line of the a vs. T graph.) Just like the slope of the a vs. T graph, the slope of the a vs.Fnet graph is equal to the inverse of the mass of the object.
- So the equation for the line above would be: a = (1/mass)*Fnet , orFnet = mass*a. (Newton's Second Law)
Extension - Once the class has established Newton's Second Law, you can ask the students to apply Newton's Second Law to predict what the acceleration of the object would be once the string stops pulling on the object. (The tension goes to 0 N.)
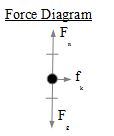
The force diagram for the would be: - From the above force diagram one can see thatFnet acting on the object is equal to amount of kinetic friction acting on it. By substituting fk in forFnet, the acceleration of the cart can be determined. The students then can check their predictions against their lab results. The y-intercept of the a vs. T graph corresponds to the acceleration of the object once the string stops pulling. (T = 0 N)
- An interesting observation can be made by comparing the y-intercepts for the sleds to each other and to the cart. The y-intercepts of the sleds will be roughly the same (assuming the bottom of the sleds and table tops are uniform) and far more negative than the y-intercept of the cart. Asking the students why the y-intercepts for the sleds are basically the same and why the y-intercept of the cart is different can lead to an interesting discussion.
- From the previous section we know that when the string stops pulling on the object that
Fnet = fk
Fnet = Fn*μk
Fn = Fg = m*g and Fne = m*at = 0 N
m*at = 0 N = m*g*
at = 0 N = g* |
- From the above derivation we can see that the at=0N of the object only depends on the between the object and the table top. (g is a constant.) If the bottoms of the sleds and the table tops are uniform then the for the all the sleds will be roughly equal. Therefore, every sled will have the same at=0N regardless of the sled's mass and the amount of kinetic friction acting on the sled.
- Since the (really internal friction) of the cart is different than the of the sleds, the at=0N of the cart will also be different. Also the of the cart is much smaller than the of the sleds so the at=0N of the cart will be much smaller than that of the sleds.
Lab written by Joseph Mahler
| Using F=ma Labs to Increase Student Scientific Dialogue |
by Andy Jackson
There are eight Scientific and Engineering Practices designated in The Next Generation Science Standards. The last four of which are
1. Using mathematics and computational thinking
2. Constructing explanations and designing solutions
3. Engaging in argument from evidence
4. Obtaining, evaluating, and communicating information
Many times in a science class students are answering questions posed by the teacher. The communication is back and forth between the teacher and the student. The teacher poses a question in the lab and the student conducts and experiment and provides an answer back to the teacher. It is easy to imagine that increased dialog between students regarding physics will increase student learning in physics. Variations on the traditional Newton’s 2nd law labs (or Atwood’s machine labs) provide a rich opportunity to increase student dialog with minimal effort. Any lab you do similar to what Joe Mahler presented in this newsletter can be tweaked to increase student dialog and thus student learning. Have one half of the class conduct the experiment where they look at the relationship between net force and acceleration. Have the other half of the class conduct the experiment where they examine the relationship between mass of the system and the acceleration. Then pair lab groups together who have not done the same experiment. The labs the two groups do are similar in some respects. They are both measuring or calculating acceleration. Yet they are different with respect to which is the controlled variable and which is the independent variable. They will also produce different graphs to represent the relationships they obtained. What gets the two groups talking with each other about the data and results they obtained is the last question in the lab,
"Talk through your experiment and results with a partner group who did the other experiment. Compare and contrast your two experiments and their results."
This increases the amount of scientific discourse the students are engaged in. Student groups who do this actively will be engaged in all of the last four Scientific Practices in the Next Generation Science Standards. More importantly they will be building, using, and strengthening their understanding of the physics concepts being taught.
| Robots Help Teach Kinematics |
by Matt Greenwolfe, October 2013
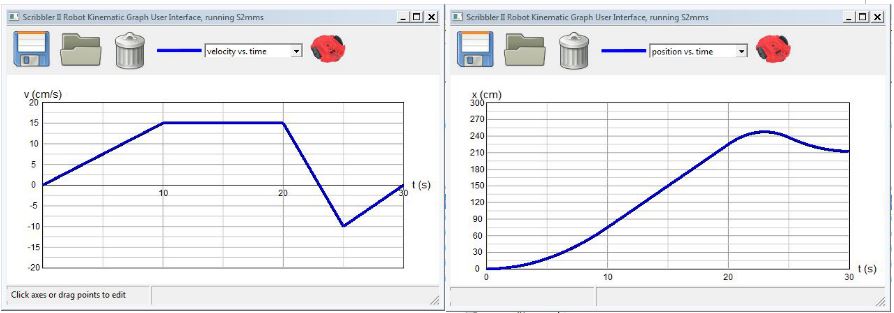
Two years ago, I re-programmed the motor driver of a commercially available educational robot, the Scribbler II from Parallax, Inc, so that it would move with mathematical precision. I also wrote a graphical user interface that enables students to draw kinematic graphs on their computer and send them to the robot to execute. Thanks to the new motor driver, the robot moves with an accuracy of 1mm/s or 1mm/s2, reliably informing the students whether their qualitative or quantitative predictions are correct. Here's an example of an exercise in graph matching designed for honors students. They are shown the following velocity vs. time graph that has been previously sent to a robot. Students must describe what it will do, and then draw a position vs. time graph to be sent to a second robot. Their solution is tested by running the two robots side-by-side.
Once the graph is drawn, students connect the robot to a USB port on their computer and click the red robot icon to send the program to the robot. The robot can then be disconnected and will run the program from its internal memory. For a more detailed description of this exercise, including a video of the test, see my blog post at http://aphysicsmicrocosm.wordpress.com/2012/11/15/turning-classic-physics-problems-into-lab-practicums-featuring-the-patrolman-and-the-speeder/ .
Do you like lab practicums? This is just one of many situations I was able to create using the robots. Classic situations like the cop and speeder problem can be turned into practicums that can be tested in the lab. Students can program a robot to avoid a head-on collision with another heading towards it. I got creative this year, and had students rescue my Einstein bobble-head that was held captive in a castle. Using multiple constant-velocity segments, students had to program their “rescue-bot” to approach the castle and return with Einstein while avoiding a robotic sentry pacing back and forth in its path. Just like other lab practicums, these exercises added a sense of fun to the class, and student engagement was evident in the way they anticipated the tests and reacted to success or failure. The robots allow me to create many lab practicums with a single apparatus and a quick and easy set-up.
After getting an idea of what I could do with the robots last year, this year I've revised my entire kinematics curriculum around the use of the robots. You could call it a lab practicum curriculum, as even the development of new concepts are presented as lab-practical situations where the students can confirm their understanding by testing their predictions, or revise their understanding when their tests so indicate. To develop constant velocity motion, students are presented with a constant velocity robot pre-programmed by me. Position is briefly defined, and a few instructions are given about how to use the program to draw a graph. Students are then asked to take measurements of the robot they are given, and program a second robot to match it. Each group's robot has a different velocity, so additional exercises ask the class as a whole to rank them from slowest to fastest, graph then on the same set of axes, or start them so they will end at the same place and time. The activities are sequenced so that students encounter new features of the graphs one at a time as they work through each puzzle. I was able to do a lot more with multi-segment constant velocity graphs and average velocity, which provided a much more thorough foundation for accelerated motion.
To introduce accelerated motion, students are simply asked to construct a velocity vs. time graph with a slanted line, and predict what the robot will do and how far it will travel. Most groups first attempt at predicting the distance involves multiplying the final velocity by the time. They quickly observe that this gives twice the actual distance and revise their approach. Understanding is confirmed by programming a second robot with the average velocity and running it along side.
If you find the approach interesting, I invite you to check out my blog http://aphysicsmicrocosm.wordpress.com/ for more details. Robots can be purchased from parallax, inc, and my software is also available for sale by contacting me via e-mail at matt_greenwolfe@caryacademy.org.
| How to Be There for Your Students Even When You Are At Home |
We all know the value of modeling problem solving for our students so that they don’t think that physics is all about finding a formula and plugging in numbers. We also know that students only learn to do problems themselves by practicing. Many times we feel like there is not enough time in class to both model problems and have students practice. One way to provide more modeling for students who need it is to make your own video solutions using an ipad or tablet, and post the solutions online. Students can stop, start, and replay the solutions as many times as they like. Alma Robinson (former TIR and current Physics Instructor at Virginia Tech) has been doing this using Educreations, a free ipad app that lets you use your iPad as a whiteboard. This app allows you to store your files on the Educreations website and either share them with your students or make them public. Another app worth trying is Doceri. This app allows you to download your files to Youtube or to email them to your students. For $30, you can also download Doceri Desktop which will link your iPad to your computer (and your LCD). This way you can walk around the room and still be writing on your board!
It is time to register for the VAST Professional Development Institute! (VAST PDI). The VAST PDI is the time and location of the VIP fall meeting and a place to grow in content knowledge, pedagogy, and network connections. There are approximately twenty physics concurrent session with three of them hosted by VIP. In addition to the physics sessions there are also several engineering and physics –integrated themed concurrent sessions. More to attend than you will be able to fit in your time there!
This year’s VAST PDI is November 14-16, 2013 at the Norfolk Waterside Marriott in Norfolk, Virginia. It should be a beautiful time of year to be at a beautiful location. Check it all out and register at http://www.vast.org/annual-pdi.html.
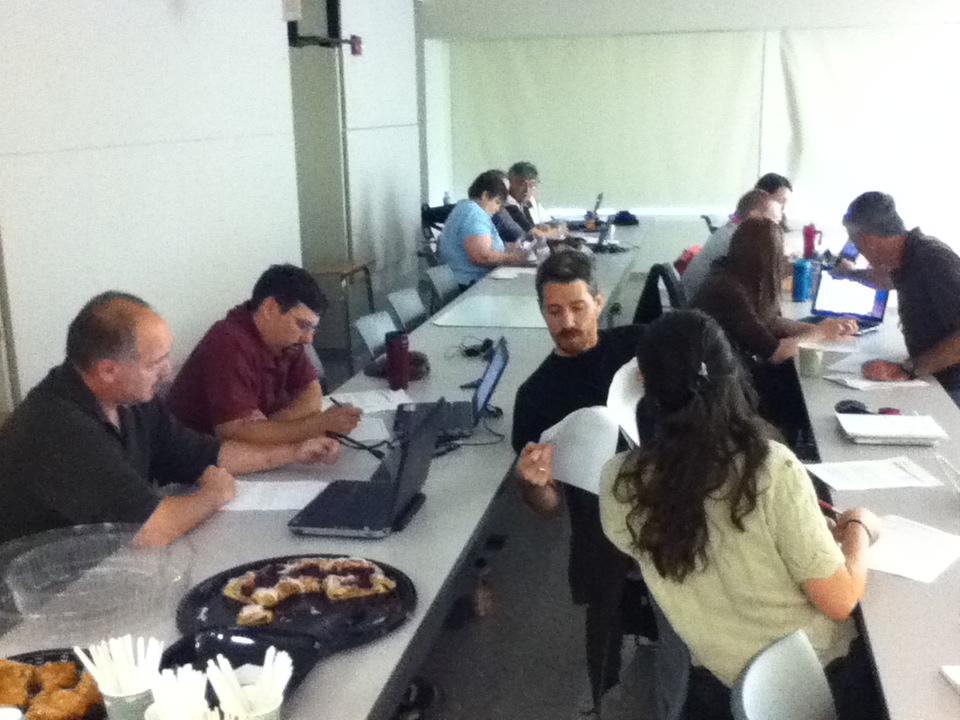
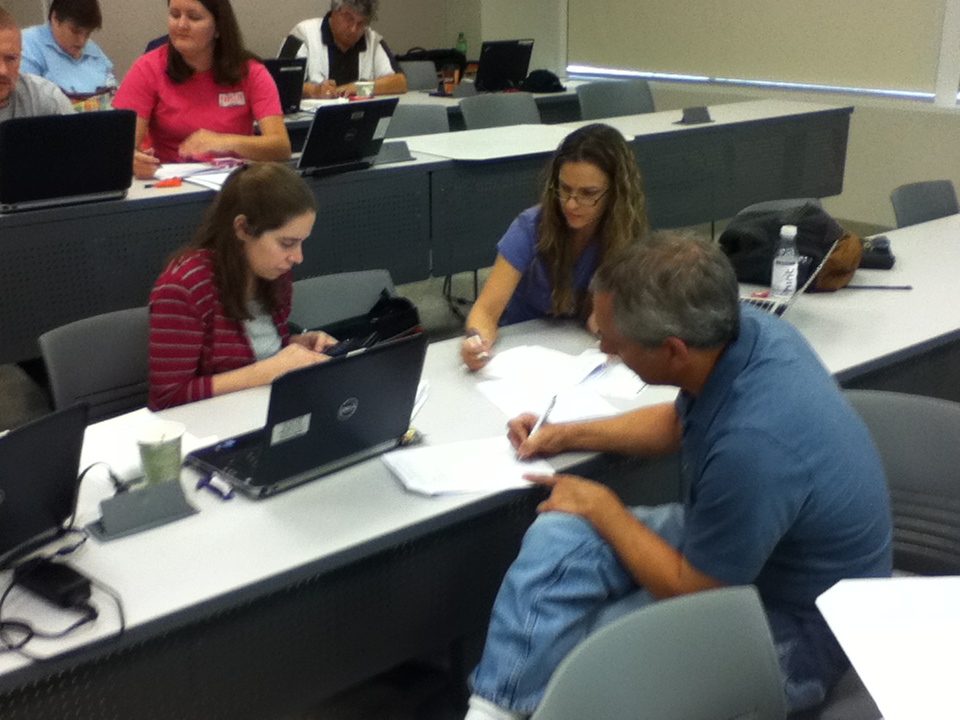
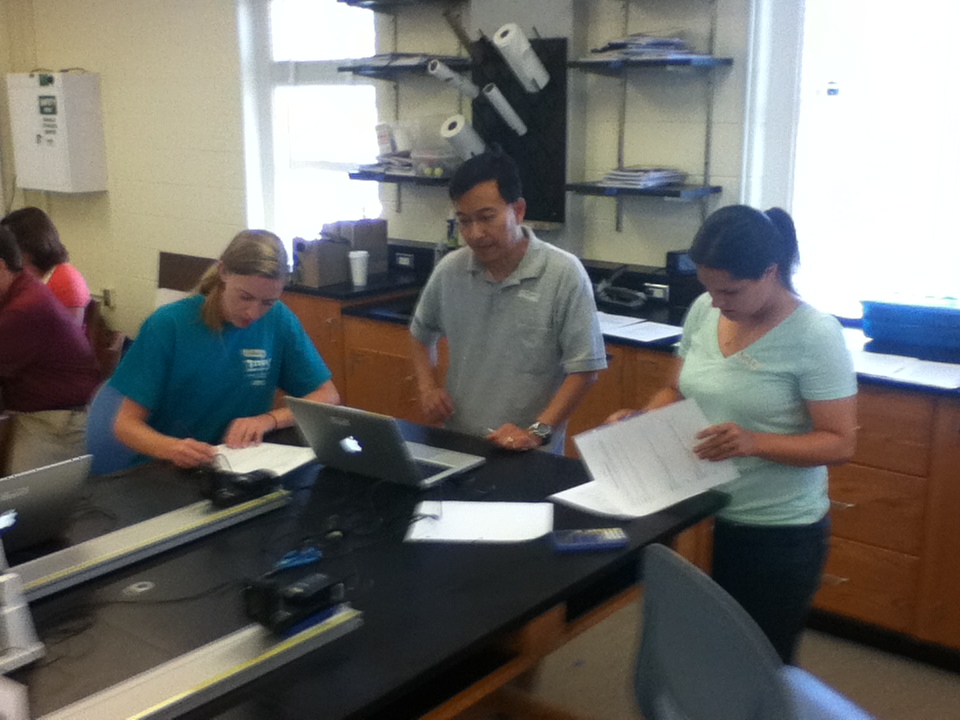
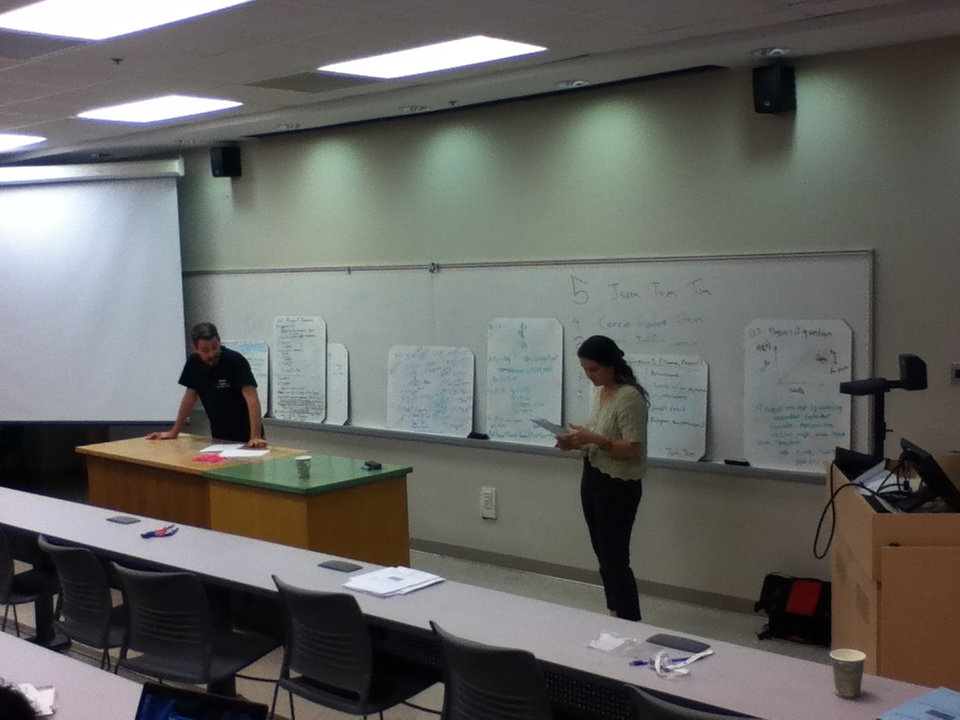
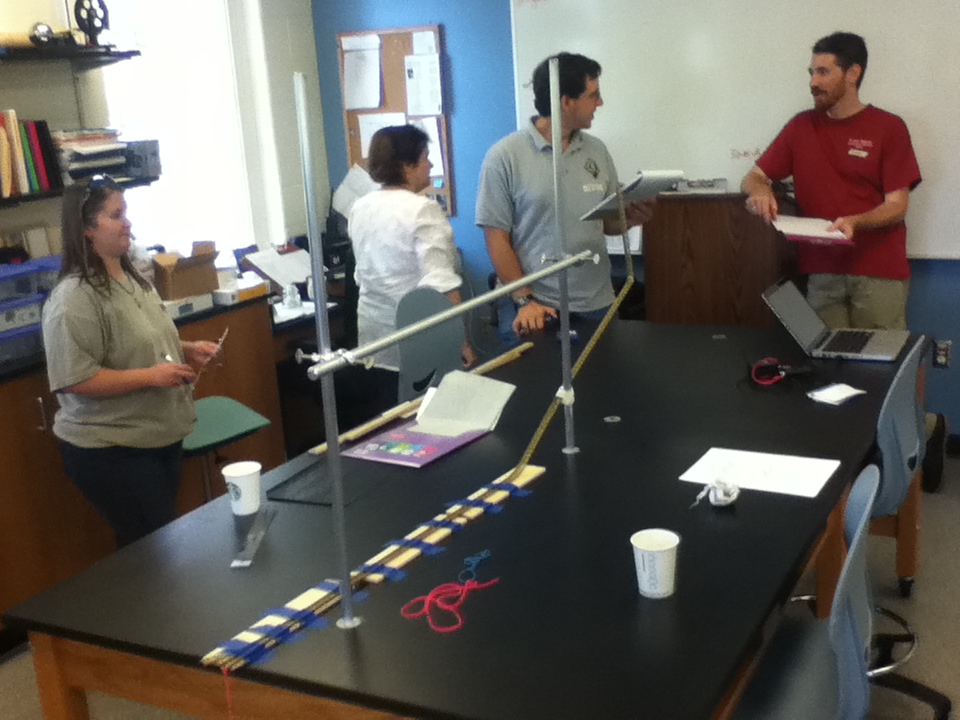
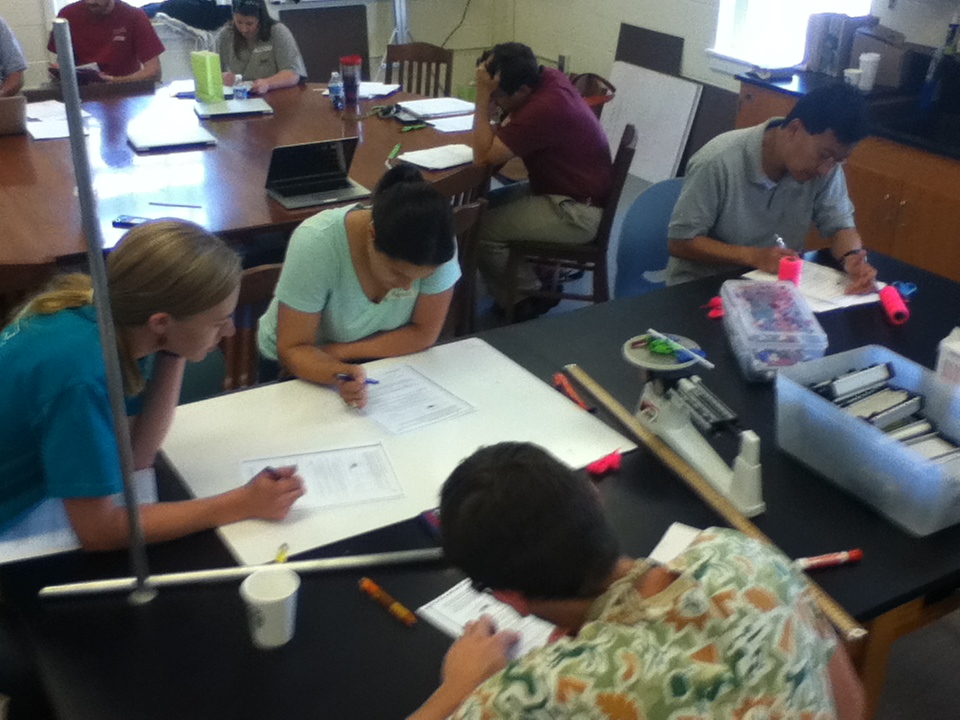
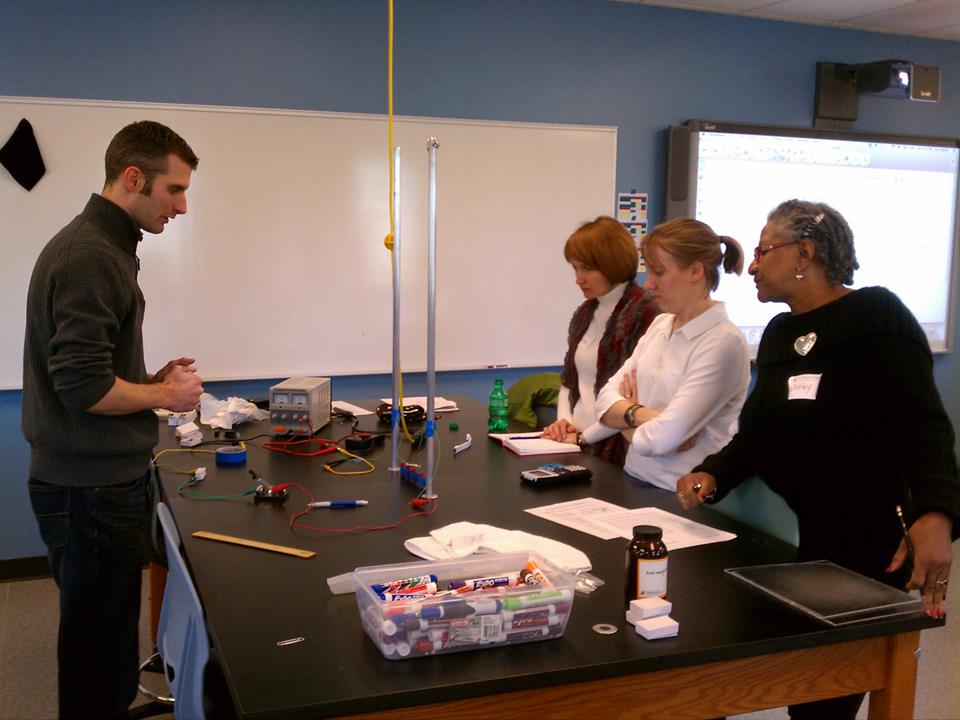
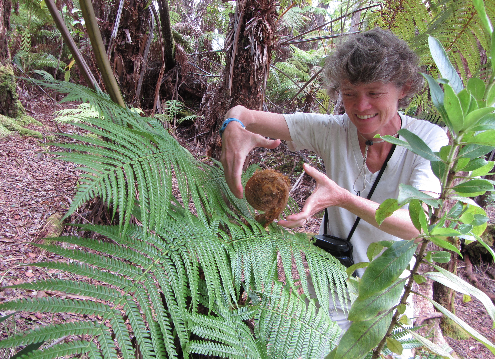
| Thanks to Everyone Who Attended Our Sept./Oct. Meetings |
We had a great time at our September and October VIP meetings. Below are some pictures from the meetings. Keep you eyes out for information about our January meeting which will be held at JMU on Saturday the 18th. If didn’t attend our Sept. or Oct. meeting consider attending our January meeting.
Join our Facebook page (https://www.facebook.com/VAST.VIP) to keep up with the latest VIP news and events.
|