Next MeetingNewsletterPast NewslettersAmusement Park Related
     
     
NewsletterTitle

Online Bonus Material

Click here for the rest of this newsletter.

Presenter: Tony Wayne
Albemarle High School , twayne[at symbol]k12albemarle.org

Va. SOL:
PH.12         The student will investigate and understand how to use the field concept to describe the effects of electric, magnetic, and gravitational forces.

Topic/Concept

A force is needed to move any object.
Force fields.
Magnetic repulsion

Materials
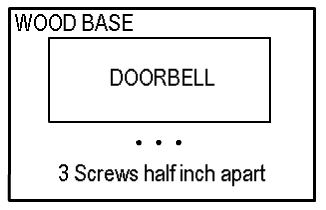
            1 - doorbell for Lowes or Home Depot. ($10)
            1 – pliers
            1 – wire cutters
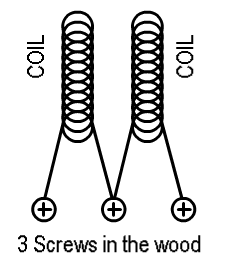
            1 – piece of  wood to mount the doorbell on
            5 – 5/8” long number 6 screws
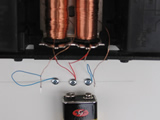
            9 – Volt battery

Safety Considerations
            Make sure the battery is not left somewhere in a position where the terminals are shorted.

Presentation

  1. The completed unit is set up a station where students are asked to explain how a door bell works.
  2. This could also be done as a classroom demonstration. A 9 Volt battery will ring the doorbell but it is designed for a 12 Volt battery. A 12 Volt battery rings the doorbell with more volume. A twelve Volt battery can be made from two six Volt lantern batteries wired in series.


How the physics is demonstrated
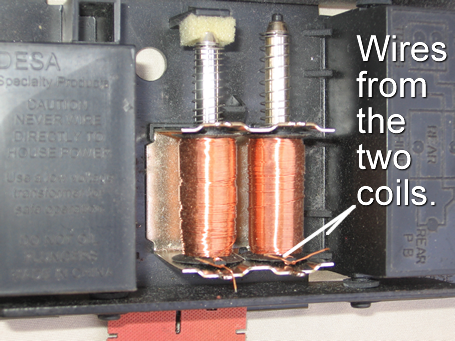
                  When the coils are energized by the battery they generate a magnetic field inside them according to Ampere's rule. The metal rods inside the coil are steel and are attacted. This pulls hte rods into and through the coil to hit a bell. When the current is turned off, the spring wrapped around the coil pulls the rod back into place and overshoots the equalibrium position and hits the other bell. before coming to a rest in the equalibrium position.
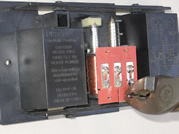
Construction

Construction Time is about 15 minutes
Preparation You will not need the cover to the doorbell. Throw it away. If your doorbell kit came with a transformer, you can set that aside as well. It will not be used.
Step 1 On a wood base, figure out where the doorbell will be mounted. Below the doorbell, drive three screws into the base. Each screw should be a half an inch apart. Do not drive them flush to the wood. Later you will wrap some wire around them so leave them about an eighth of an inch above the wood.
Step 2 There will be three screw terminals on top of the doorbell. If you hold 9 Volt battery to two terminals, the bell will work. But students will not clearly see how it works. Remove the screw terminals. My doorbell was held in place by four twisted pieces of metal. Twist these straight and lift the piece up.
Step 3 Use wire cutters to snip the wires from the screw terminals. This cover piece should come off easily now.
Step 4 The coils are now exposed and easy to see. The coils’ wire may be wrapped around another plastic piece. Unwrap them so they are loose. One will be short the other can be made longer by unwinding the wire once around the coil.
Step 5 The wires have a very thin enamel coating on them. Use sand paper to scrap the coating off the ends of the wires. You will have four wires. Two from each coil. Attach a wire that is long enough to stretch from the wire ends to the screws to the coils wires.
Step 6 Connect the wires as shown in this diagram. Wrap the wire ends around the screws. Drive the screws flush with the wood.
Finished To make the doorbell chime. Touch the 9 Volt battery to a pair of screws. You may find that 12 Volts works more reliably than the 9 Volt battery with one coil versus the other. I have had some mixed results.

Click here to see slide show consisting of larger images from above.


A special thanks to VASTfor hosting our web site.